How to Update TNT SIM Registration Fast – Official 2026 Guide


 May 16, 2026 1:12 pm
Need to update TNT SIM registration right now? Here’s the short answer: visit smart.com.ph/simreg if your registration is still incomplete or pending. If it’s already fully approved and you need to correct a detail, go to any Smart Store in person. Both are free. Both take under 30 minutes.
Keep reading for the full step-by-step breakdown, all three official methods, and the one thing most guides get wrong – the difference between re-registering and updating an existing registration.
This guide covers how to update SIM registration TNT for Filipino nationals, foreigners, minors, and business accounts – all three official 2026 methods explained.
What Does “Update TNT SIM Registration” Actually Mean?
Updating your TNT SIM registration means correcting or changing personal information already submitted during your initial registration under RA 11934. This is different from first-time registration. Common update scenarios include a wrong address, a rejected ID upload, a name mismatch, or a change in your government ID after moving or renewing. If your ID keeps getting rejected during submission, see this guide for fixing the TNT SIM registration invalid ID error.
Understanding this distinction is critical – because the process for updating an approved registration is different from registering a brand-new SIM, and most guides online never explain that difference.
Fastest Way to Update Your TNT SIM Registration
Not sure which method fits your situation? Use this quick decision table:
| Your Situation | Fastest Method | Estimated Time |
|---|---|---|
| Registration incomplete or pending | Online Portal (smart.com.ph/simreg) | 5–10 minutes |
| Registration approved, need to fix details | Smart Store (in person) | 15–30 minutes |
| Prefer using your smartphone | GigaLife / Smart App | 10–20 minutes |
| SIM deactivated | Call *888 or visit Smart Store | Varies |
| Foreign national | Smart Store (in person) | 20–30 minutes |
Quick Tip: If you already received a Control Number after your initial submission, your SIM is confirmed. To change those confirmed details, you must visit a Smart Store – the online portal will block re-submission for already-registered numbers. Users who cannot access the registration portal should troubleshoot the TNT SIM registration page not loading problem first.
Why TNT SIM Registration Updates Are Required Under Philippine Law
TNT (Talk ‘N Text) is a prepaid mobile brand operated by Smart Communications, Inc., part of the PLDT Group – one of the Philippines’ two largest telecom networks.
Under Republic Act No. 11934, also known as the SIM Registration Act, all mobile subscribers in the Philippines are legally required to register their SIM cards with their telecom provider. The National Telecommunications Commission (NTC) supervises compliance and enforcement.
The law applies to every SIM card regardless of purchase date – no grandfather clause, no exemptions for older numbers. Its purpose is to reduce mobile-facilitated crimes: text scams, bank fraud, online harassment, and the spread of disinformation.
Why would you need to update your TNT SIM registration?
- You entered incorrect personal details during initial registration
- You moved and your address has changed
- Your uploaded ID was blurry, expired, or rejected by the system
- Your registration was flagged for manual review
- There is a name mismatch between your ID and your form
- You can also confirm your current registered details through this SIM ownership verification guide before requesting corrections.
- You registered under the wrong nationality or ID type
Legal Note: Under Section 10 of RA 11934, submitting false or misleading information – even unintentionally – carries penalties including fines and imprisonment. Correcting errors promptly is the legally safe action. Official policy is available at ntc.gov.ph.
What You Need Before Updating Your TNT SIM Registration
Have everything ready before you start. Stopping mid-process to look for documents can cause the portal session to time out.
For Filipino Nationals:
- Your 11-digit TNT mobile number
- One valid, non-expired government-issued ID. Accepted IDs:
- PhilSys National ID
- Philippine Passport
- LTO Driver’s License
- SSS ID / UMID
- GSIS ID
- PRC ID
- Voter’s ID
- Senior Citizen Card
- NBI Clearance or Police Clearance
- A device with a working front camera (biometric selfie verification is required by the Smart system)
- Stable internet connection (for online methods)
- Your email address and an alternate contact number
For Foreign Nationals:
- Valid Passport
- ACR I-Card (Alien Certificate of Registration) issued by the Bureau of Immigration, OR
- Return ticket showing departure date (for tourists)
- Visa extension documents if applicable
File Upload Requirements:
- Accepted formats: JPEG, JPG, or PNG only
- Maximum file size: 5 MB per image
- Photos must be clear, well-lit, and fully legible
First-Time Registration vs. Updating Your Registration – The Key Difference
This is the section most competing guides skip – and it’s the reason so many users get stuck.
| Your Situation | What to Do | Where |
|---|---|---|
| Brand-new SIM, never registered | Complete new registration | smart.com.ph/simreg or GigaLife App |
| Registration pending or incomplete | Resume and complete registration | smart.com.ph/simreg |
| Registration fully approved, details wrong | Request a correction | Smart Store (in person) |
| Registered under wrong name | Name correction | Smart Store (in person, 2 IDs required) |
| SIM deactivated for non-registration | Re-register within reactivation window | smart.com.ph/simreg |
The online portal is built for new and incomplete registrations. Once your SIM is fully registered and confirmed with a Control Number, the portal will not allow re-submission. Any corrections to an approved registration must be handled at a Smart Store. This is the detail that causes the most confusion — and no competing article explains it clearly.
How to Update TNT SIM Registration Online – Step-by-Step (Method 1)
Best for: Registrations that are incomplete, pending, or not yet confirmed.
“When I walked through this process on a pending registration, the whole thing – from opening the portal to receiving the confirmation SMS – took about 8 minutes. The selfie step is the only part that can slow you down if your lighting is poor.”
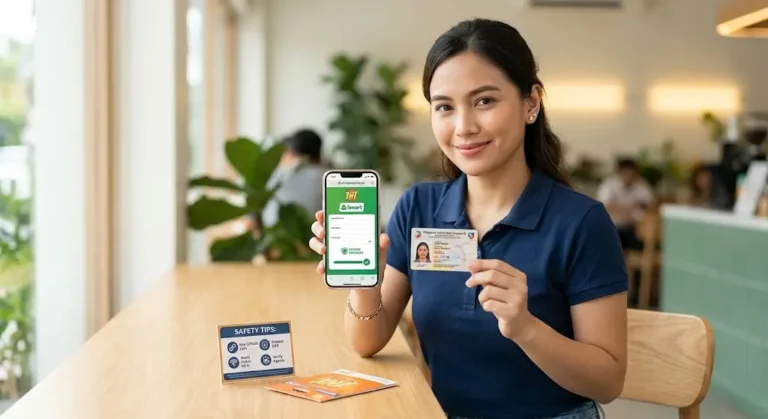
Open the Official Smart/TNT Registration Portal Go to smart.com.ph/simreg on any internet-connected device. This is the only portal officially authorized by the NTC for TNT and Smart SIM registration. Avoid third-party sites that imitate this URL – they are not affiliated with Smart Communications and are designed to steal personal information. Follow these official safety tips when registering TNT SIM to avoid phishing websites and fake OTP scams.
Enter Your 11-Digit TNT Mobile Number Type your TNT number carefully in the provided field. Agree to the Terms and Conditions and Privacy Notice. A typo here means the OTP goes to the wrong number – double-check before continuing.
Step 3: Verify Your Number via OTP Click “Send OTP.” A 6-digit One-Time Password (OTP) arrives by SMS on your TNT number. It expires in 2 minutes – enter it promptly. If it doesn’t arrive within 2 minutes, click “Resend OTP.” If your SIM is fully deactivated, you will not receive the OTP – call Smart at (02) 8888-1111 via landline.
Complete the Customer Information Form Once your number is verified, fill out the registration form:
- Select Registration Type (new SIM or existing SIM)
- Choose your Nationality
- Upload clear photos of the front and back of your valid, non-expired ID
- Complete the biometric selfie verification – face the camera directly in bright, even lighting
- Review all details auto-filled by the OCR system from your ID
- Manually correct any OCR errors in name, birthdate, or address before submitting
Step 5: Submit and Save Your Control Number After submission, a success screen shows your Control Number. Screenshot this immediately – it is your official proof of registration. A confirmation SMS will follow. Prepaid subscribers typically receive a 3 GB free data bonus upon successful registration.
How to Update TNT SIM Registration at a Smart Store – Step-by-Step (Method 2)
Best for: Correcting details on a fully approved registration name errors, address changes, ID updates, foreign national corrections.
Step 1: Find Your Nearest Smart Store Visit any authorized Smart Store or Smart Retailer nationwide. Use the branch locator at smart.com.ph, or dial *888 from your TNT number and ask for the nearest branch. Most stores operate approximately 10 AM–7 PM on weekdays.
Step 2: Bring the Right Documents Carry your TNT SIM card and at least one valid, non-expired government-issued ID showing the correct information. If you’re correcting a name discrepancy, bring two IDs – both must show the correct full name. For address updates, a recent utility bill or barangay certificate provides useful supporting documentation.
Step 3: Explain the Correction Needed to the Representative Tell the Smart Store agent specifically what needs to be updated – spelling of name, wrong birthdate, old address. Being specific speeds up the process. The representative will access your registration record in Smart’s internal system and process the correction directly.
Step 4: Biometric and Identity Verification The representative will verify your identity through your ID documents and may capture a new selfie for biometric verification. You may be asked to sign an attestation form confirming your correct personal details. This is standard procedure under RA 11934 compliance requirements.
Step 5: Collect Your Confirmation Once processed, you’ll receive an SMS confirmation on your TNT number. Before leaving the store, ask the representative for a reference number and write it down – this is your in-store equivalent of the online Control Number.
How to Update TNT SIM Registration via GigaLife / Smart App – Step-by-Step (Method 3)
Best for: New or incomplete registrations processed conveniently on a smartphone.
The GigaLife App – also listed as the Smart App on some devices – is the official Smart Communications mobile application, available on both Android and iOS. It supports SIM registration and basic account management for TNT and Smart subscribers.
Step 1: Download the Smart / GigaLife App Open the Google Play Store (Android) or Apple App Store (iOS) and search “Smart App” or “GigaLife.” Install and open the app.
Step 2: Tap the SIM Registration Banner On the home screen, look for the “Register Your SIM Now” banner and tap it. If it doesn’t appear, navigate through the app menu to the SIM Registration section.
Step 3: Enter Your TNT Number and Verify via OTP Enter your 11-digit mobile number. An OTP will be sent to your TNT SIM – enter it to confirm identity.
Step 4: Complete the Registration Form Fill in your personal details accurately. Upload your valid ID (front and back) and complete the biometric selfie verification. The app’s OCR feature auto-fills your information from your ID – review it carefully and correct any misreads before submitting.
Step 5: Submit and Save Your Control Number Submit the form. Your Control Number appears on the confirmation screen – screenshot it. A confirmation SMS follows within minutes.
Special Cases: Updates for Specific Subscriber Types
Minors (Under 18 Years Old) Minors cannot update their own TNT SIM registration independently. A parent or legal guardian must handle the process and must provide:
- Their own valid government-issued ID
- Proof of relationship (PSA Birth Certificate or equivalent)
- Signed consent forms – the SIM stays registered under the guardian’s name
Corporate and Business Accounts Business SIMs require bulk registration updates through Smart’s dedicated corporate channel. Call Smart Business at (02) 8 811-0211 or contact your assigned Smart account manager. Do not attempt business updates through the consumer portal.
Foreign Nationals Foreigners must update in person at a Smart Store – the online portal has limited support for foreign document types. Bring your Passport and ACR I-Card. Tourist SIM registrations are valid for 30 days only and can only be extended with an approved visa extension from the Bureau of Immigration.
Deactivated SIMs If your TNT SIM was deactivated due to failed or missed registration, there may be a short reactivation window (typically 5 days post-deactivation, subject to current NTC directives). Call *888 immediately or visit a Smart Store – do not wait, as the window closes quickly.
If your number has already been disabled completely, follow this guide for recovering a blocked TNT SIM.
Method Comparison: Online Portal vs. Smart Store vs. GigaLife App
| Feature | Online Portal | Smart Store | GigaLife App |
|---|---|---|---|
| Best For | New/pending registrations | Correcting approved registrations | New registrations on mobile |
| Availability | 24/7 | ~10 AM–7 PM (weekdays) | 24/7 |
| Internet Required | Yes | No | Yes |
| Estimated Time | 5–15 minutes | 15–30 minutes | 10–20 minutes |
| Biometric Selfie | Yes | Yes (may vary) | Yes |
| Fixes Approved Registrations | ❌ No | ✅ Yes | ❌ No |
| Cost | Free | Free | Free |
| Best for Foreigners | ❌ Limited | ✅ Full support | ❌ Limited |
Subscriber Type vs. Recommended Method
| Subscriber Type | Best Method | Key Documents | Notes |
|---|---|---|---|
| Filipino Prepaid – New SIM | Online Portal | Valid ID + Selfie | Free 3 GB upon success |
| Filipino Prepaid – Updating Details | Smart Store | 2 valid IDs | Portal won’t accept re-submission |
| Filipino Postpaid | Text YES to 5858 | Existing account | SMS confirmation only |
| Foreign Tourist | Smart Store | Passport + Return Ticket | SIM valid 30 days only |
| Foreign Resident | Smart Store | Passport + ACR I-Card | Longer validity with visa |
| Minor (with Guardian) | Smart Store | Guardian’s ID + Birth Certificate | Registered under guardian’s name |
| Corporate / Business | Smart Business Channel | Business documents | Bulk registration available |
Warning: 6 Things NOT to Do When Updating Your TNT SIM Registration
- Do NOT use third-party registration websites. Sites that copy the look of smart.com.ph/simreg are not affiliated with Smart or TNT. They are phishing sites designed to steal your personal data. Always verify the URL before entering any information.
- Do NOT submit an expired ID. The system automatically rejects expired IDs. If your only ID is expired, renew it before attempting registration -there is no workaround or alternative path for expired documents.
- Do NOT upload non-supported file formats. Only JPEG, JPG, and PNG are accepted. Files over 5 MB are also rejected. Compress and convert your image before uploading if needed.
- Do NOT register under someone else’s identity. Fraudulent registration under RA 11934 carries serious criminal penalties – fines and potential imprisonment – regardless of whether the other person gave permission.
- Do NOT let the OTP expire before entering it. The OTP is valid for only 2 minutes. If it expires, click “Resend OTP” – never try to enter an expired code, as this will trigger a lockout error on your number.
- Do NOT close the browser before saving your Control Number. Once the confirmation screen closes, retrieving your Control Number requires contacting Smart support directly, which takes time. Screenshot it the moment it appears.
Pro Tips: 6 Ways to Get Your Update Right the First Time
- Face a window for your selfie. Natural front-facing light is the single biggest factor in biometric selfie verification success. Overhead or rear lighting creates shadows that fail facial recognition.
- Photograph your ID on a dark, plain surface. High contrast between your ID card and the background helps the OCR system accurately read your name, ID number, and birthdate.
- Use Chrome or Firefox on desktop. Mobile browsers occasionally have trouble with camera access during the selfie and ID upload steps. On smartphones, use the GigaLife App instead of a browser.
- Keep your phone and computer within reach at the same time. The OTP arrives on your TNT number via SMS – you’ll need your phone accessible while completing the form on your computer.
- Complete the process in one sitting. The Smart portal session times out after inactivity. Starting and stopping mid-process means restarting from the OTP step.
- Save your Control Number in two places. Screenshot it and copy it to your email or notes app. This number is your official proof of registration if Smart ever queries your account.
Troubleshooting: 5 Real Problems and How to Fix Them
Some users also experience a generic TNT server error during registration caused by Smart system congestion or maintenance.
Problem 1: OTP Not Arriving on My TNT Number
What’s causing it: Network congestion, low signal, SIM partially deactivated, or a portal-side delay.
How to fix it: Wait the full 2 minutes before clicking “Resend OTP.” After two failed attempts, restart your phone to re-establish network registration, then try once more. If you’ve attempted 3+ times with no OTP, your SIM may be partially or fully deactivated – call Smart at (02) 8888-1111 via landline. Do not keep requesting OTPs; excessive requests can temporarily lock your number.
Problem 2: ID Upload Keeps Getting Rejected
What’s causing it: Expired ID, image too dark or blurry, file too large, or unsupported file format.
How to fix it: Retake the ID photo in bright, even lighting – eliminate glare and shadows. Keep the file under 3 MB (well within the 5 MB limit). Export the image as JPEG before uploading. If your ID is expired, there is no alternative – renew it before proceeding.
Problem 3: Name Mismatch Error
What’s causing it: The OCR system misread a character from your ID (common with similar letters), or your previously submitted name differs from your current ID.
How to fix it: Before submitting, review every auto-filled field carefully. Edit any OCR errors manually – the system frequently confuses letters like “rn” and “m” or “l” and “I.” If your registration was already approved with a wrong name, visit a Smart Store with two valid IDs both showing your correct full legal name.
Problem 4: “SIM Already Registered” Message on the Portal
What’s causing it: Your TNT number is fully registered in Smart’s system – this is not an error.
How to fix it: Your registration is active. The portal will not allow re-submission for a confirmed number. If you need to update information, call *888 from your TNT number or visit a Smart Store directly.
Problem 5: Selfie Camera Won’t Open in Browser
What’s causing it: Camera permission is blocked in your browser settings, or your browser is incompatible with the portal’s camera module.
How to fix it: Open your browser settings and grant camera permission to the Smart registration site. On mobile, check your phone’s app settings and ensure the browser has camera access enabled. Switch to Google Chrome or Firefox. On iOS, Safari sometimes handles camera access better than Chrome.
How Long Does a TNT SIM Registration Update Take?
Short answer: 5–15 minutes online. 15–30 minutes in-store.
More detail:
- Automated online verification: For common IDs – PhilSys, LTO Driver’s License, Philippine Passport – Smart’s system typically completes verification in 5–10 minutes. Approximately 85% of registrations clear at this stage.
- Manual review cases: About 12–15% of submissions are flagged for human verification. This can take 15 minutes to 2 hours depending on current queue volume.
- In-person Smart Store corrections: Most corrections are processed within the same store visit – typically 15–30 minutes.
- Confirmation SMS: Regardless of method, expect your confirmation SMS within 24 hours of successful submission.
Best Practices for Keeping Your TNT SIM Registration Current in 2026
- Update during off-peak hours. Late evenings and early mornings have lower server load, which means faster OTP delivery and fewer portal timeouts.
- Always use the official URL. Verify smart.com.ph/simreg in your browser address bar before entering any data. Bookmark it to avoid accidentally landing on phishing sites in the future.
- Store your Control Number securely. Save it in your email, notes app, or a password manager. You will need it if Smart ever audits your account or if you need to dispute a registration issue.
- Review your details annually. If you move, change your primary government ID, or change your TNT number, update your registration at a Smart Store. Outdated details can block future account access or recovery.
- Never share your OTP – with anyone. Not even with someone claiming to be a Smart representative. Legitimate Smart staff never ask for your OTP over phone or chat.
- For minors, calendar-remind guardian updates. If the registered guardian changes due to custody change or death, update the registration at a Smart Store promptly. Outdated guardian details can complicate account access later.
FAQS
How do I update my TNT SIM registration if my details are wrong?
Visit any Smart Store in person with at least one valid government-issued ID showing your correct information. If your registration is already fully approved, the online portal cannot process corrections – only Smart Store agents can update confirmed registration records. Bring two IDs if you’re correcting a name error.
Can I update my TNT SIM registration online for free?
Yes. All TNT SIM registration and update services are completely free under RA 11934. No legitimate channel — the Smart portal, GigaLife App, or Smart Store — will ever charge a fee. Any website or person asking for payment is running a scam.
How long does the TNT SIM registration update take to process?
Online updates for pending registrations typically complete in 5–10 minutes for common IDs, or up to 2 hours if flagged for manual review. Smart Store corrections are usually processed within the same visit, around 15–30 minutes.
What happens if I don’t correct wrong information in my TNT SIM registration?
Submitting inaccurate information violates Section 10 of RA 11934, which carries fines and potential imprisonment. There is no grace period — correct any errors at a Smart Store as soon as you discover them.
Can I update my TNT SIM registration through the GigaLife App?
The GigaLife / Smart App supports new and incomplete registrations. If your SIM is already fully registered and approved, the app will not allow re-submission. Corrections to an approved registration require a Smart Store visit.
What documents do foreigners need to update TNT SIM registration?
Foreign nationals need a valid Passport plus an ACR I-Card (for residents) or a return ticket showing departure date (for tourists). All updates must be done in person at a Smart Store. Tourist SIM registrations are valid for 30 days only and require a Bureau of Immigration visa extension to remain active beyond that.
How do I confirm my TNT SIM registration update was successful?
You will receive a confirmation SMS on your TNT number after a successful update, along with a Control Number. The portal or app also shows a success screen. If you don’t receive confirmation within 24 hours, call *888 from your TNT number or (02) 8888-1111 via landline.
Conclusion
Updating your TNT SIM registration in 2026 comes down to knowing which method fits your situation. Use the Smart portal (smart.com.ph/simreg) for incomplete or pending registrations. Visit a Smart Store to correct already-approved details. Use the GigaLife App for mobile convenience on new registrations. Users planning to switch from physical SIMs can also read this updated TNT eSIM registration guide.
The one thing most people miss: once your SIM is confirmed and you have a Control Number, the online portal won’t let you change anything that’s when an in-person visit becomes your only official path. For the most current policies, refer to Smart Communications (smart.com.ph) and the National Telecommunications Commission (ntc.gov.ph). You can reach Smart support anytime at *888 from your TNT number.
Disclaimer: This article is for informational purposes only and does not constitute legal advice. For official policy, always refer to Smart Communications (smart.com.ph) and the National Telecommunications Commission (ntc.gov.ph). Procedures may be updated – verify at official sources before acting.
Azlan Tareen
Azlan Tareen is a TNT SIM registration specialist with over 4 years of experience in the Philippine telecom sector. He focuses on TNT SIM activation, Smart services, APN settings, PUK codes, and mobile loading through GCash. Azlan shares practical guides to help users manage TNT services easily. Connect with him on LinkedIn or explore his telecom insights online.