TNT SIM Registration Official Link 2026 – SIM registration TNT link
As a TNT SIM user myself, I understand how stressful it feels when your mobile data or calls suddenly stop working due to incomplete registration. When I completed my TNT SIM Registration, I realized how simple the process actually is but only if you follow the official method under Republic Act No. 11934, regulated by the National Telecommunications Commission (NTC).
Under this law, all TNT prepaid and postpaid users must register their SIM cards to avoid permanent deactivation. In this guide, I’ll walk you through the exact steps, required documents, and the official TNT registration link so you can complete your registration quickly, safely, and without any mistakes.

What Is TNT SIM Registration?
TNT SIM Registration is the official process of linking your TNT mobile number to your personal ID, as required by Republic Act No. 11934. Regulated by the National Telecommunications Commission (NTC), this process protects your SIM from deactivation and helps prevent fraud, keeping your mobile number secure and fully compliant.
How To Register TNT SIM?
You can successfully register your TNT SIM using a valid ID through any of the following methods to stay connected with your family and friends:
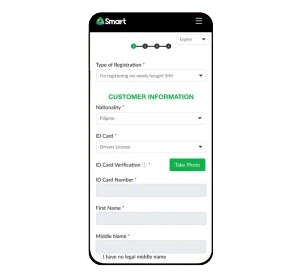
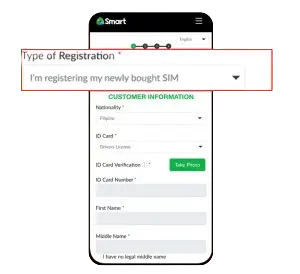
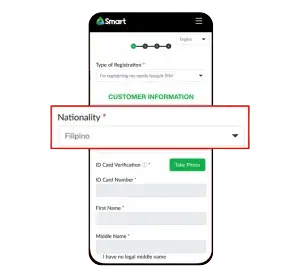
TNT SIM Registration Online Through Portal
I recently registered my TNT SIM online through the official portal, and it was the fastest and simplest way to activate my SIM without visiting a service center. Here’s exactly how I did it:


For TM SIM registration, the process is very similar. After submitting your details and completing ID and selfie verification, you’ll receive a confirmation message once your TM SIM is successfully registered, After activation, you can also easily Check Load Balance in TNT to monitor your remaining credits and data usage without any interruption.
Register via Smart/Gigalife App
I recently registered my TNT SIM using the GigaLife App, and it was super quick and easy. Make sure your SIM is inserted and your phone has internet, then follow these steps to complete registration in minutes. The GigaLife App serves as the official TNT SIM Registration App.
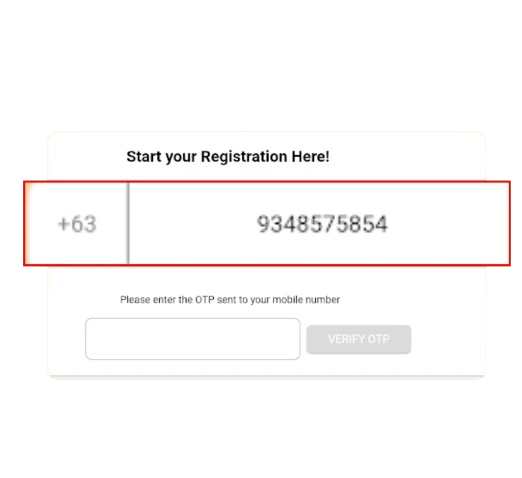
Step 1: Insert SIM and open the app
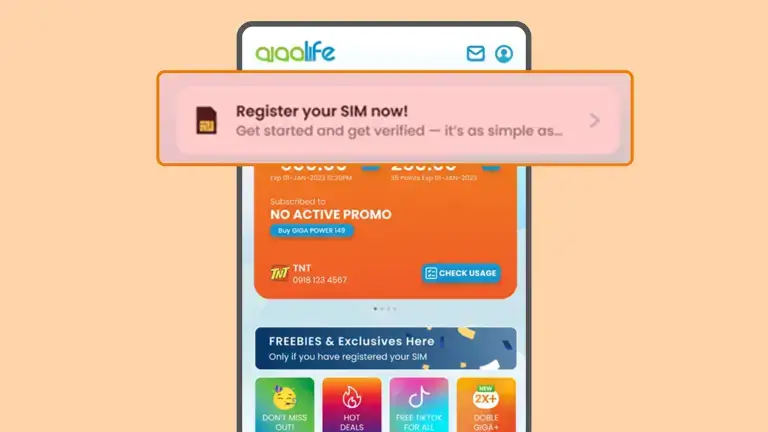
Step 2: Tap “Register Your SIM”
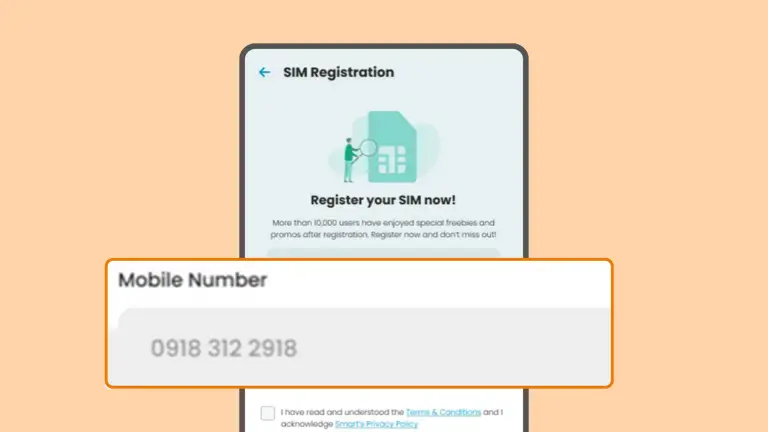
Step 3: Enter your mobile number
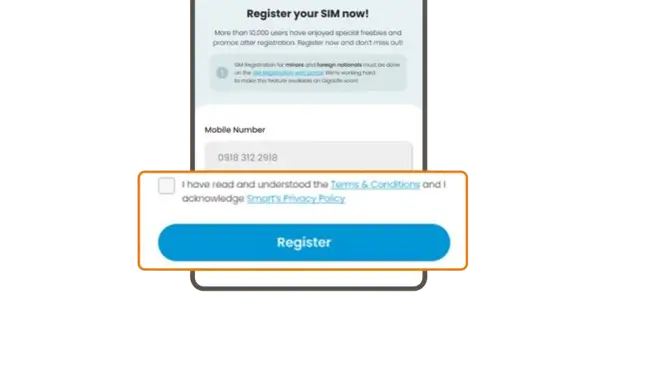
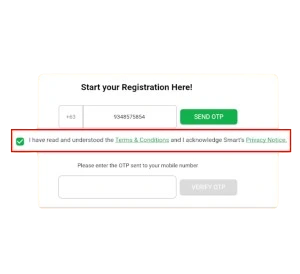
Step 4: Read and agree to terms
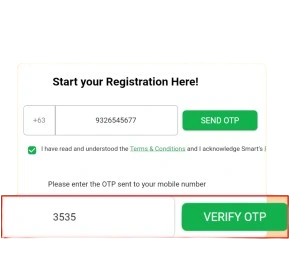
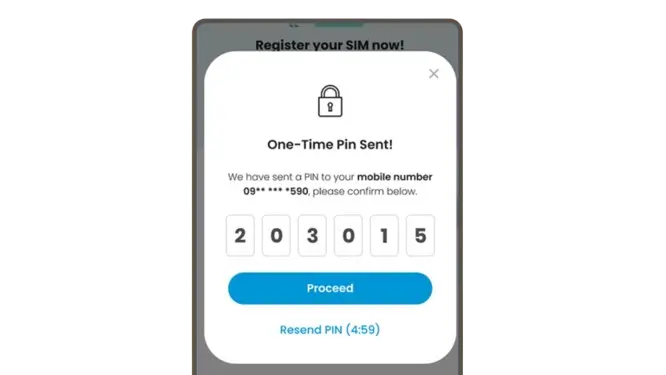
Step 5: Send and enter OTP
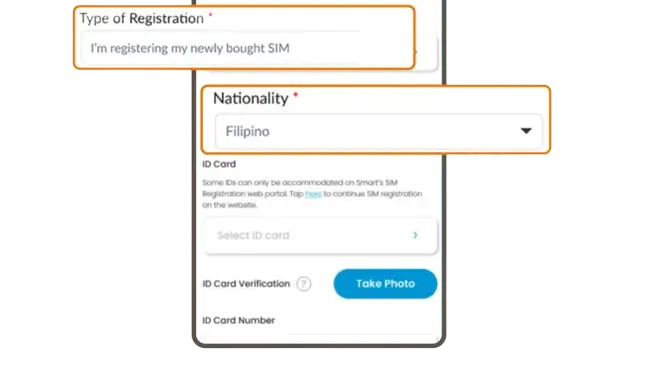
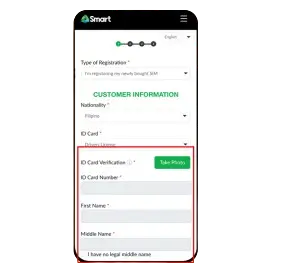
Step 6: Choose registration type and ID
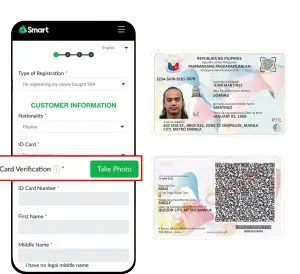
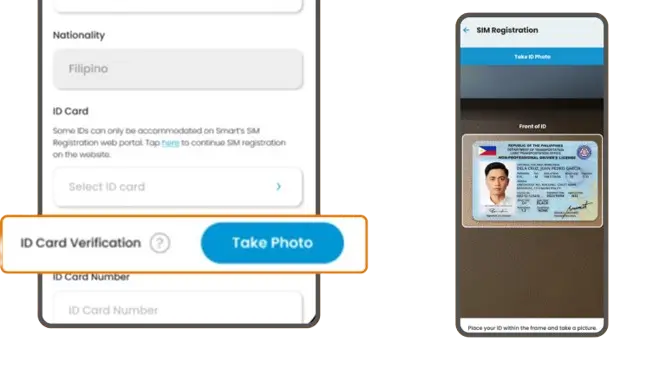
Step 7: Upload ID photo
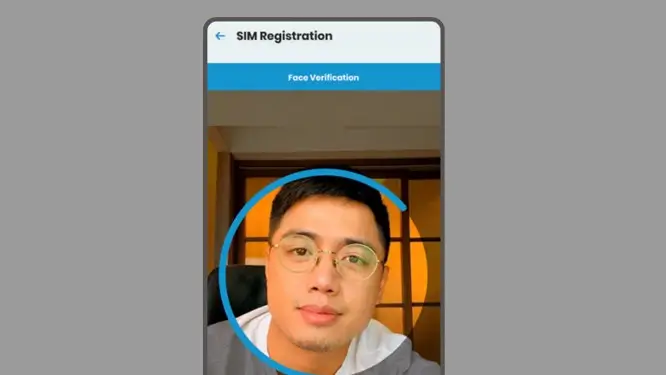
Step 8: Take a selfie
Step 9: Confirm personal information

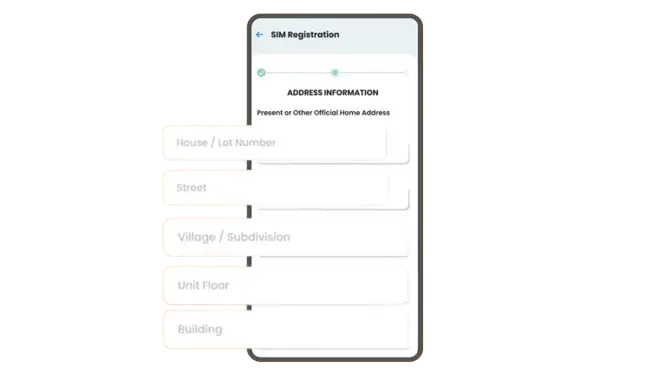
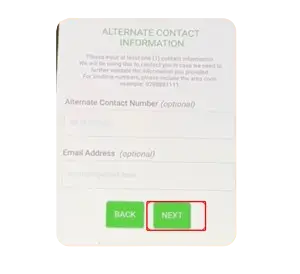
Step 10: Enter your address
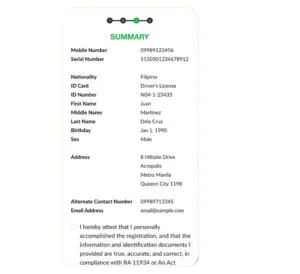
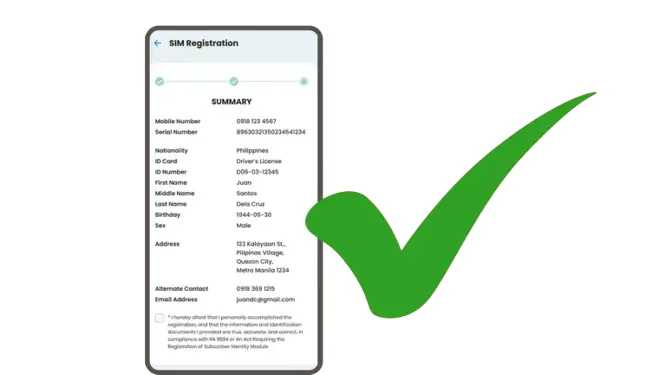
Step 11: Final review and submit
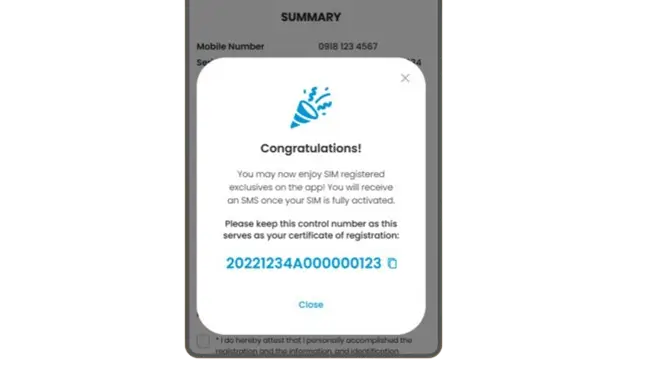
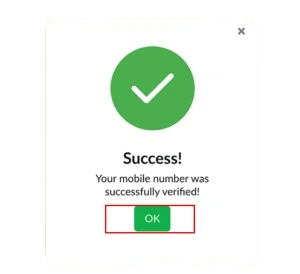
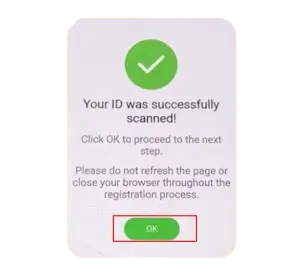
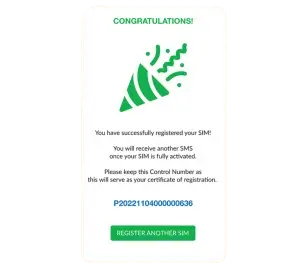
Step 12: Success message
Register TNT SIM with Chatbot Assistance
I also tried registering my TNT SIM using the official chatbot, and it was surprisingly convenient. Here’s how you can do it:
- Visit the Smart official website and start a chat with the TNT chatbot via Messenger.
- Request assistance from the chatbot to connect with a SIM registration agent.
- During the live chat, the agent will ask for your SIM number and required personal information.
- Once submitted, an OTP will be sent to your registered mobile number.
- Share the OTP with the agent, who will then complete your SIM registration on your behalf.
Offline Registration SIM Card TNT Method
Registering your TNT SIM at a service center is straightforward if you prefer doing it in person. Follow these steps to complete your registration smoothly:
- Visit the nearest TNT/Smart store with your valid ID and SIM card.
- Ask the staff for TNT SIM Registration assistance.
- Fill out the registration form provided by the store.
- Include Full Name, Date of Birth, Gender, Nationality, Address, and Contact Number.
- Submit a valid ID for verification.
- Accepted IDs include Passport, Driver’s License, or Philippine National ID.
- For those who prefer handling things in person, walk-in registration at a Smart branch is fully supported.
- Visit the Smart official website to set an appointment before heading in
- Bring your valid ID card — staff will verify your documents on the spot
- Branch employees will walk you through the registration type selection and fill out your details with you
- Once your identity and documents are verified, registration is processed immediately
- For any follow-up issues, you can return to the same Smart branch for assistance
TNT SIM Registration for International Visitors & Tourists
For international visitors in the Philippines, registering a TNT SIM is straightforward, with a few additional document requirements. Here’s the official, step-by-step guide:
- Visit the official TNT registration website: https://simreg.smart.com.ph/
- Enter your mobile number to receive an OTP (One-Time Password) and verify your number.
- Fill in your personal details, including:
- Passport number
- Valid visa ID
- Other required personal information
- Upload your passport and visa in JPEG, JPG, or PNG format.
- Complete face verification by taking a clear selfie that matches your passport photo.
- Submit your information. Verification may take a few days.
- Once verified, your TNT SIM will be active and fully compliant with Philippine regulations.
Tip: Keep a scanned copy of your passport and visa handy for smoother verification, if you need to complete processes like Transfer TNT SIM Ownership while updating your personal account details abroad.
TNT SIM Registration for Government and Private Entities
Registering SIM cards for organizations follows the standard process for individuals, with additional documentation to verify the organization’s identity.
For Government Entities
For Private Entities / Corporations
Tip: Always ensure that documents are current and clearly scanned to avoid verification delays, especially when trying to Unlock Blocked TNT SIM through identity verification or account recovery processes.
How to Activate TNT 5g SIM Card?
After registering your TNT SIM or upgrading to 5G, follow these steps to activate your SIM smoothly:
Tip: Make sure your SIM is inserted correctly and follow the menu instructions carefully to avoid delays, especially during the TNT eSIM Registration process where accurate details and proper setup are important for successful activation.
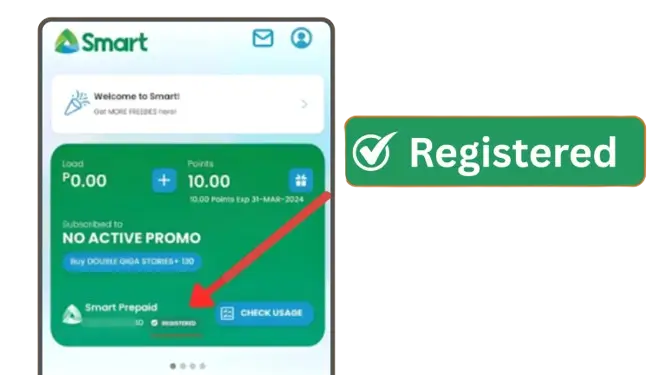
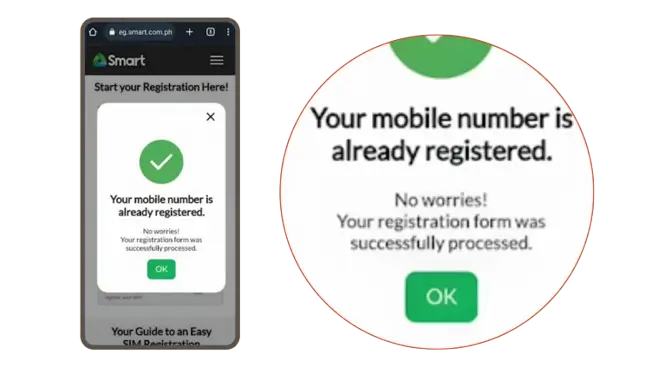
TNT SIM Registration Verification
Checking the TNT SIM registration status helps confirm whether your SIM is successfully registered and active. You can verify it via the GigaLife App or the Smart SIM Registration Portal.
Through the GigaLife App
Through the Smart SIM Registration Portal
TNT Sim Registration Requirements
Under Republic Act No. 11934, all SIM users in the Philippines must register their SIM cards with valid identification and accurate personal details. Below are the complete requirements based on user category.
Basic Information Required (For All Applicants)
Every applicant must provide:
1. For Filipino Citizens / Local Residents
Filipino users must submit:
Any One Valid Government-Issued ID:
Ensure the ID is not expired and clearly visible during upload.
2. For Foreign Nationals Visiting as Tourists
Foreign tourists must provide:
3. For Foreign Nationals Holding Other Types of Visas
Applicants under work, student, or long-term visas must submit:
4. For Persons of Concern (POCs)
Persons of Concern must submit:
5. For Minors (Below 18 Years Old)
Minors cannot register a SIM under their own name. The SIM must be registered under a parent or legal guardian.
Required documents include:
The parent or guardian will be legally responsible for the SIM registered under their name, especially when activating mobile services or claiming TNT Promos After SIM Registration for the registered number.
Who needs to register
Under Republic Act No. 11934, all active mobile subscribers in the Philippines are required to complete TNT SIM Registration to prevent fraud and avoid service deactivation.
You must register your TNT SIM if you fall into any of the following categories:
Failure to register may result in temporary suspension or permanent deactivation, as mandated by the National Telecommunications Commission (NTC).

Benefits of TNT SIM Registration
After completing my TNT SIM Registration, I noticed several important benefits beyond just meeting the legal requirement. Here’s what stands out:
1. Enhanced Security

Once my TNT SIM was registered, I felt more secure knowing my number was officially verified. Registration reduces the risk of fraud, identity misuse, and unauthorized activities linked to anonymous SIM cards.
2. Safer Telecommunications Environment

By registering my SIM, I’m contributing to a more secure telecom system in the Philippines. Verified users help reduce scams and illegal activities across the network.
3. Full Access to TNT Services

After registration, I was able to enjoy uninterrupted access to TNT promos including unlimited calls, SMS, and mobile data without worrying about restrictions.
4. 24/7 Customer Support Access

As a registered user, accessing customer support became easier. Any account-related concern or technical issue can be resolved quickly through official Smart and TNT channels.
5. No Risk of SIM Deactivation
The biggest relief was knowing my SIM would not be deactivated. Registration ensures continuous service calls, texts, and mobile data work without sudden interruption, especially when you need to Update TNT SIM Registration Fast to avoid service delays or network issues.
Deadline and Penalties
Under the SIM Registration Act (RA 11934), all TNT SIM users must register within the deadline set by law. Unregistered SIMs will be deactivated until registration is completed.
Deadlines
Penalties
These rules ensure SIM security, fraud prevention, and compliance across the Philippine telecom industry, especially when comparing services like TNT vs Globe SIM for better network reliability and registration support.
Rewards After TNT SIM Registration
Complying with the SIM Registration law in the Philippines and registering your TNT SIM comes with exciting rewards as a token of appreciation. Here’s what new and existing subscribers can enjoy:
Rewards for New TNT Subscribers
Rewards for Existing TNT Subscribers
ing TNT SIM users also receive special rewards:
- 3 GB of additional data
- Unlimited calls to all networks
- Unlimited text messages
Tip: Rewards may vary depending on promotions. Check the TNT website or GigaLife App for the latest offers.
Common Issues with TNT SIM Registration — and How to Fix Them
While registering a TNT SIM, users may sometimes face problems such as OTP not arriving, rejected details, or service errors. Here’s a step-by-step guide to troubleshoot these issues effectively:
Didn’t Receive OTP
Page Not Loading
Rejected Details
Smart / GigaLife App Isn’t Responding
Input Detail Errors
Internet or Server Issues
Code Not Received
Form Submission Errors
Comparison Between TnT Regular SIM and E-SIM
Confused between a TNT Regular SIM and an E-SIM? Here’s a clear comparison to help you choose the best option for your needs:
| Feature | TNT Regular SIM | TNT E-SIM |
| SIM Type | Physical triple-cut (Regular, Micro, Nano) SIM | Digital eSIM |
| Activation | Inserted into your phone to activate | Installed via QR code directly on your device |
| Device | Compatible with 2G, 3G, 4G/LTE, & 5G devices | Compatible with eSIM-capable devices |
Tip: If you travel frequently or use multiple devices, E-SIM is more convenient. If you prefer a physical card and traditional activation, TNT Regular SIM is ideal, especially if you want to better understand the Smart vs TNT SIM Difference before choosing the right option for your mobile needs.
Customer Support
TNT provides a dedicated support system to assist users with SIM registration, account verification, technical issues, and service-related concerns. Use the official channels below for reliable help:
Always use official TNT channels to ensure accurate guidance and secure solutions.
Key Features — TNT SIM Registration
From experience helping users complete their TNT SIM Registration, these are the main features and benefits noticed:
1. Keeps Your SIM Active
Properly registered TNT SIMs remain active for calls, texts, and mobile data — unregistered SIMs risk deactivation.
2. Legal Compliance
Registration meets requirements under the Philippines SIM Registration Act (Republic Act No. 11934), ensuring your mobile number is fully compliant.
3. Enhanced Security & Fraud Protection
Registered users can often receive free data and promo credits immediately after completing SIM registration.
4. Free Data Rewards After Registration
Registered users can often receive free data and promo credits immediately after completing SIM registration.
5. Multi‑Channel Registration Options
TNT SIMs can be registered online, via Smart/GigaLife App, chatbot, or at service centers — offering flexible options to suit everyone.
6. Secure Identity Verification
OTP verification and ID + selfie validation ensure your details are protected and confirmed before activation.
Pros and Cons of TNT SIM Registration
PROS
CONS
FAQs About TNT SIM Registration
Conclusion
TNT SIM Registration is simple via the official portal, GigaLife App, chatbot, or in-store. Whether you’re a local, tourist, or organization, completing registration ensures your SIM is compliant under Republic Act No. 11934, secure, and protected from deactivation.
Once registered, you get uninterrupted access to TNT services, rewards, and a safer telecom experience. Always use official TNT channels and provide accurate info for smooth verification.

Azlan Tareen 
Azlan Tareen is a TNT SIM registration specialist with over 4 years of experience in the Philippine telecom sector. He focuses on TNT SIM activation, Smart services, APN settings, PUK codes, and mobile loading through GCash. Azlan shares practical guides to help users manage TNT services easily. Connect with him on LinkedIn or explore his telecom insights online.